Read my previous article – an overview on how to post cropped ears that describes different ear posting methods.
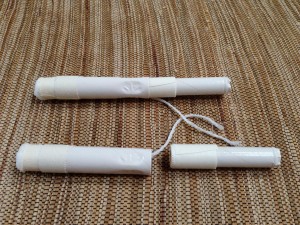
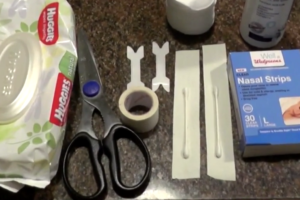
Ear posting with tampons seems to be the most common method. I found a Family Dobes ear posting tutorial that was easy to follow:
There is an alternative way to use backers rod. It didn’t work for my puppy – his ears were too heavy causing backers rod to bend. But it gives you an option of some other materials to use.
By the 7th week of posting, my puppy’s ears where too strong and even tampons began to bend with tension. I had to get creative and figure out how to keep the posting materials straight.
Ear posting with tampons – modified method.
1. Make the tube more rigid.
Wrap the tape around one side of the thinner part of a paperboard tube in the place where the two pieces connect. It will hold them together a lot firmer.
Leave a longer cotton tip, tape it very tightly to keep it in place. We are about to make the tube a bit heavier than before – longer cotton tip prevents the tube from scratching inside of the ear.
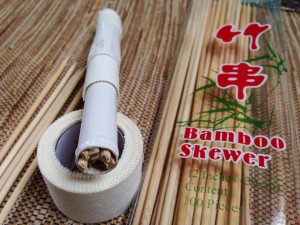
2. Stuff the tube with bamboo skewers.
Prior to connecting both sides of the tube together: insert 2 longer skewers alongside the inner wall of the tube (sort of like a fork). Sharp ends of the skewers have to pierce the cotton inside. Cotton will stop the skewers from going through to the ear.
Now connect the two parts of the paperboard tube together. Take a few more skewers, cut off the sharp edges and stuff the tube tightly. Cut the uneven edges that stick out of the tube.
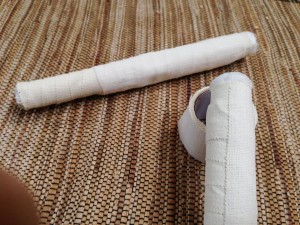
3. Smooth the rigid surface with extra stripe of tape.
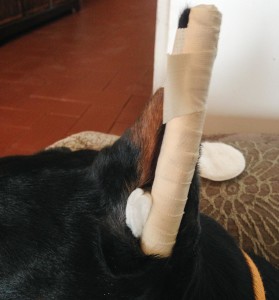
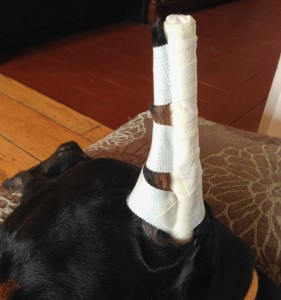
Wrap the whole tube with tape as it was shown in Family Dobes ear posting tutorial and then add a piece of tape alongside the tube in a place that goes toward the ear. It will smooth out the ragged edges of tape and protect skin inside the ear from being scratches (it is due to the heavier tube now).
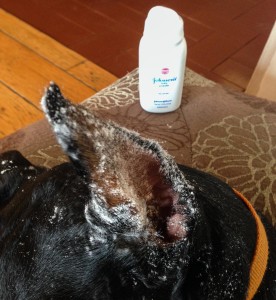
4. Protect the skin with baby powder.
Athletic tape sticks to the skin and hair very well. I used baby powder occasionally to prevent tape from sticking too much.
5. Push out ear pockets.
Insert the tampon into the ear as shown in Family Dobes ear posting tutorial. Then fold one cotton pad twice and put it between the ear pocket and the tampon. This will push the ear pocket out to ensure that the ear will stand straight up later.
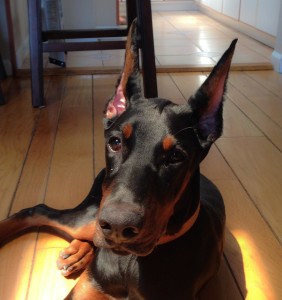
This is a very important step that most of the tutorials ignore. If the ear pocket sags – the ear will keep folding on the top of the head, despite if it’s straight or not. Ear pocket – is what holds the entire ear up.
6. Tape the ear to the tampon as shown in Family Dobes ear posting tutorial.
It is important to keep a tiny bit of the ear tip uncovered, but not too much. If the ear tip is too hot or swollen it means the tape is too tight, it cuts off blood circulation and needs immediate re-taping. If you leave too much of ear tip uncovered – it will eventually begin to fold inside, giving a “devilish” shape to the ear. If that’s the shape you want – make sure both ears have the same lengths of the tip open.
Work in progress at 7 weeks of posting.
I taught my puppy to lie down and remain still for the entire ear posting procedure. At the end – he would always get a treat. After 3-4 initial postings – he couldn’t wait to get his ears done!
There are two alternative methods to posting with tampons:
- A light ear posting method using tape only – tape crown.
- The easiest way to post cropped ears – tape tubule.
